Residential projects don’t fail because builders can’t build. They fail because people don’t agree on what’s being built—until it’s too late.
Most homeowners can’t read architectural drawings with confidence. They’ll nod through a floor plan meeting, say they understand the elevations, and still feel uncertain. Then construction starts, walls go up, and the client suddenly realises the kitchen feels smaller than expected, the window placement doesn’t match what they imagined, or the exterior doesn’t look like the “reference photo” they saved on their phone. That’s when the costly part begins: design changes, delays, rework, and tension with stakeholders.
This is why 3D house rendering for client approvals has become one of the most practical tools for home builders, renovation firms, and contractors. A clear set of 3D visuals makes the design real before any excavation happens. It reduces misunderstandings, shortens the approval process, and protects your margins by preventing late design iterations on site.
In this blog, we’ll break down how 3D house rendering supports approvals, how to use renderings in client presentations, and what kind of exterior and interior renderings actually help clients make decisions confidently—before you break ground.
Why approvals are harder than they look in residential projects
On paper, a “design approval” sounds straightforward: you share drawings, the client reviews, then you proceed.
In real life, approvals are messy because:
Clients approve drawings they don’t fully understand
Small design decisions (like window heights) feel abstract until visualised
Interior flow is difficult to judge from a 2D plan
Exterior style is interpreted differently by different people
Multiple stakeholders are involved: spouses, parents, lenders, designers
The result is that approvals often happen with hidden uncertainty. And uncertainty is what triggers changes later.
A strong 3D rendering workflow removes that uncertainty by showing clients the design the way they experience it: from eye level, as a real house, with real light, real scale, and realistic finishes.
What is 3D house rendering and why it changes the approval process
3D house rendering is the process of converting design inputs—plans, elevations, and construction drawings—into realistic visualisations of a residential project.
Those visualisations typically include:
Exterior rendering showing the façade, rooflines, materials, and streetscape context
Interior rendering showing rooms, furniture layouts, lighting, and finishes
3D floor plan views that make circulation and room relationships obvious
Optional virtual walkthrough visuals that make “flow” easy to understand
When the client sees the project rendered properly, design decisions shift from guesswork to informed choices. That changes the whole approval process:
Fewer “I didn’t realise…” moments
Faster client sign-offs
Better quality feedback during early design iterations
More confident decisions on finishes and upgrades
Instead of the client approving lines on paper, they approve a set of visuals that show the true intent of the design.
The biggest cause of design changes: clients can’t picture the house
Even smart, detail-oriented homeowners struggle to visualise from drawings. This is not their job. They might not understand:
How ceiling height affects the feel of a room
How natural light enters throughout the day
How furniture fits in a living area
How much of the backyard is lost to an extension
What a façade style looks like when scaled to the real street
Clients often rely on assumptions. They reference Pinterest, Instagram, or a friend’s home, but their project has different dimensions and constraints. That mismatch is where disputes and change requests start.
A well-prepared set of 3D renderings closes the gap between imagination and reality. It turns “I think I get it” into “Yes, that’s what I want.”
How 3D visuals improve client presentations
Client presentations are not just about showing progress—they are about guiding decisions.
When you introduce 3D renderings into client presentations, three things happen:
1) Clients engage more deeply
Instead of staring at drawings, clients respond emotionally and practically. They point at what they like and dislike. Feedback becomes specific, not vague.
2) Decisions happen faster
When the client can see the kitchen, they can choose the joinery colour. When they can see the façade, they can confirm materials. Approvals become simpler.
3) Stakeholders align
A spouse who was unsure becomes confident. A parent who kept questioning the layout understands it instantly. A lender or investor sees a coherent plan. The same visual becomes a shared reference for stakeholders.
This is one of the biggest advantages of 3D: it creates a common language for everyone involved.
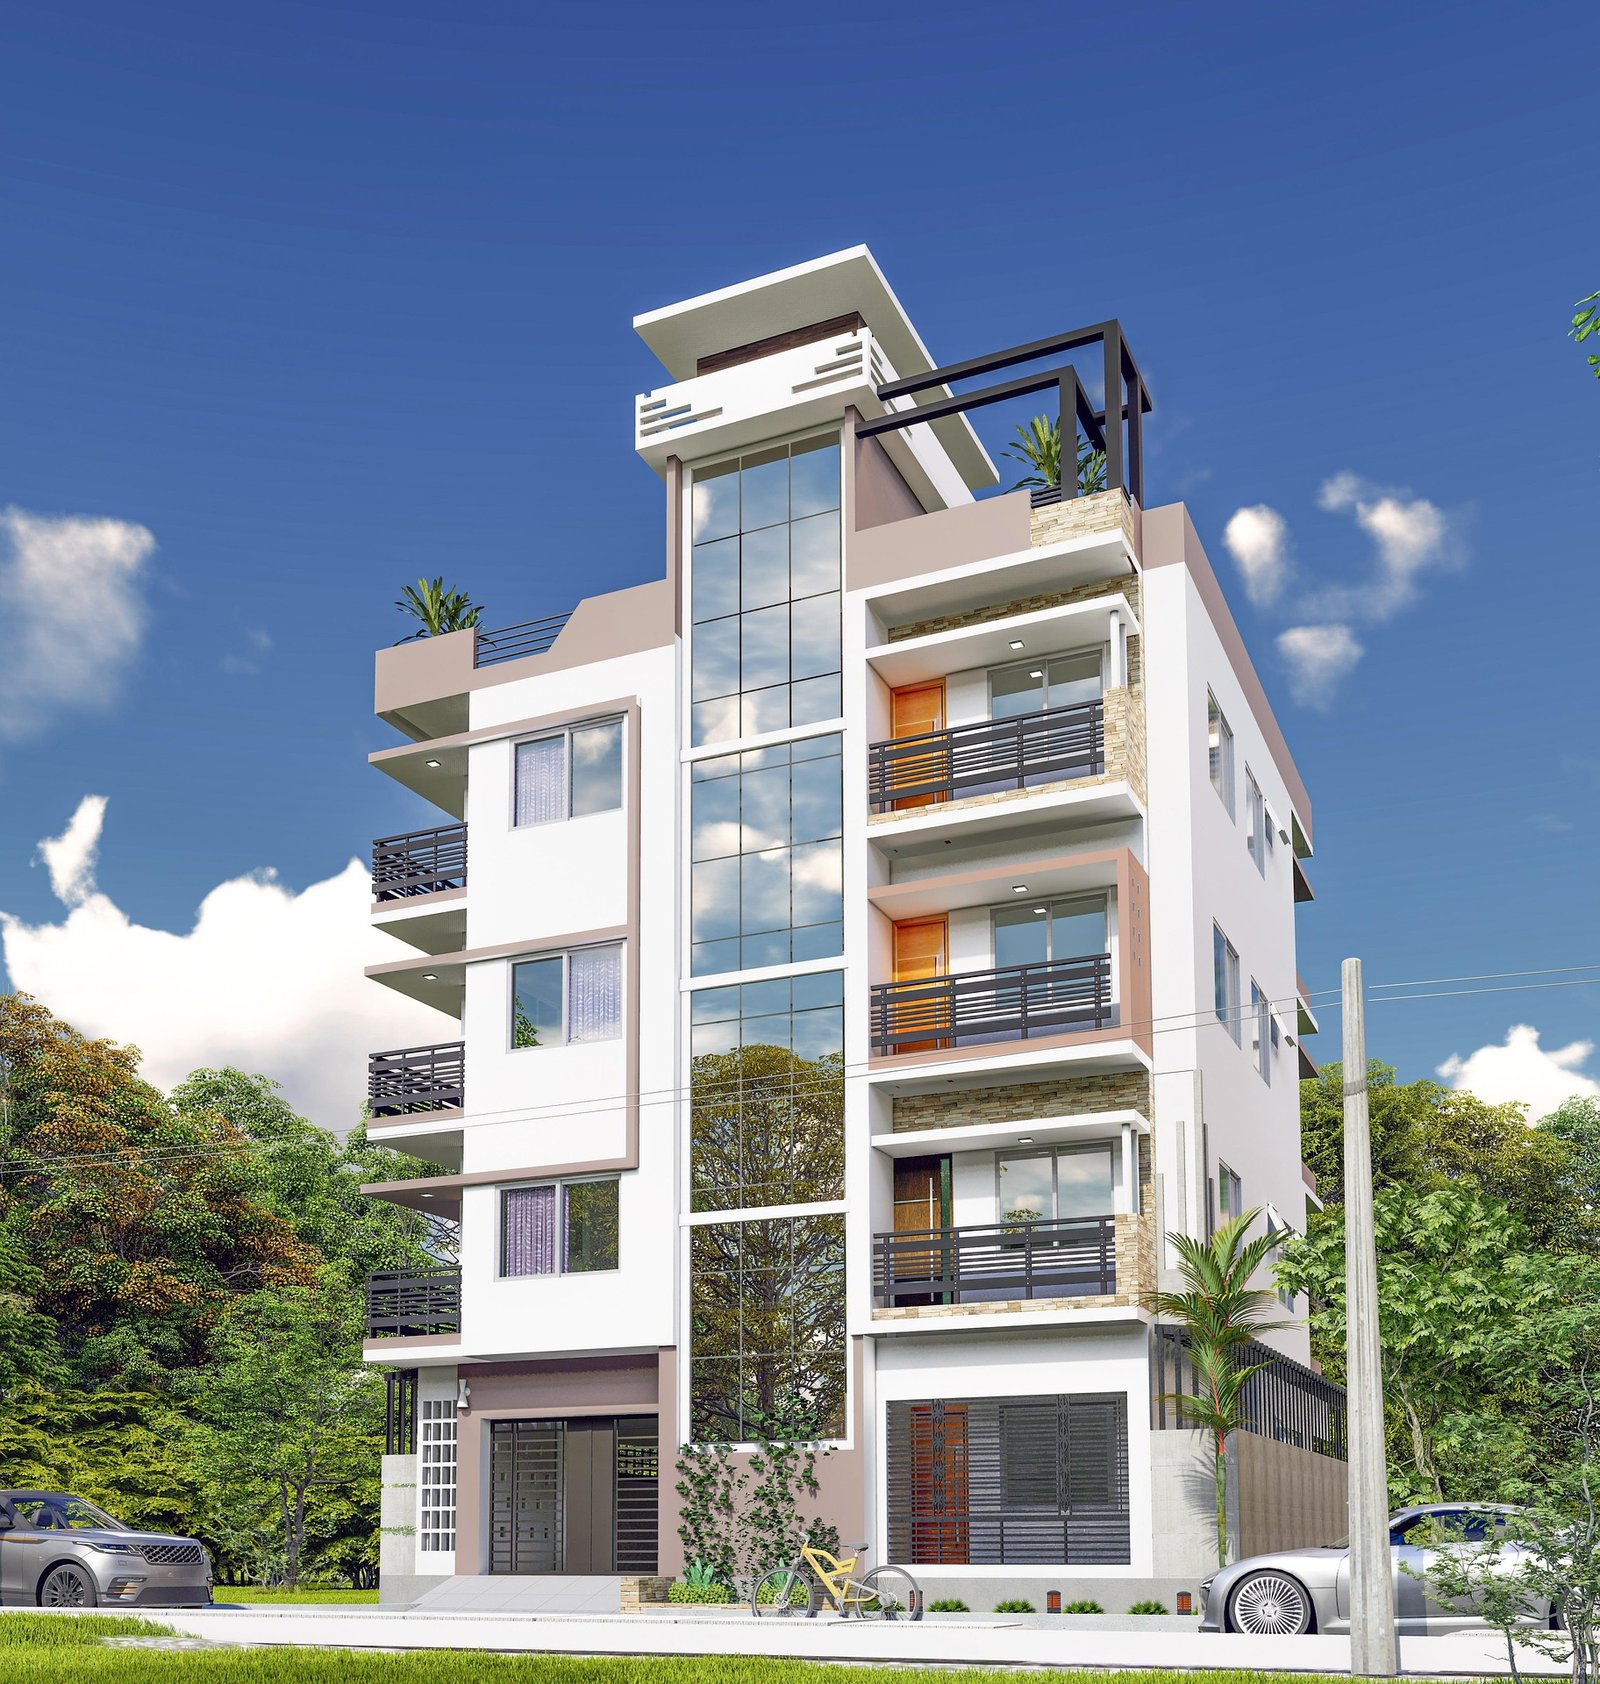
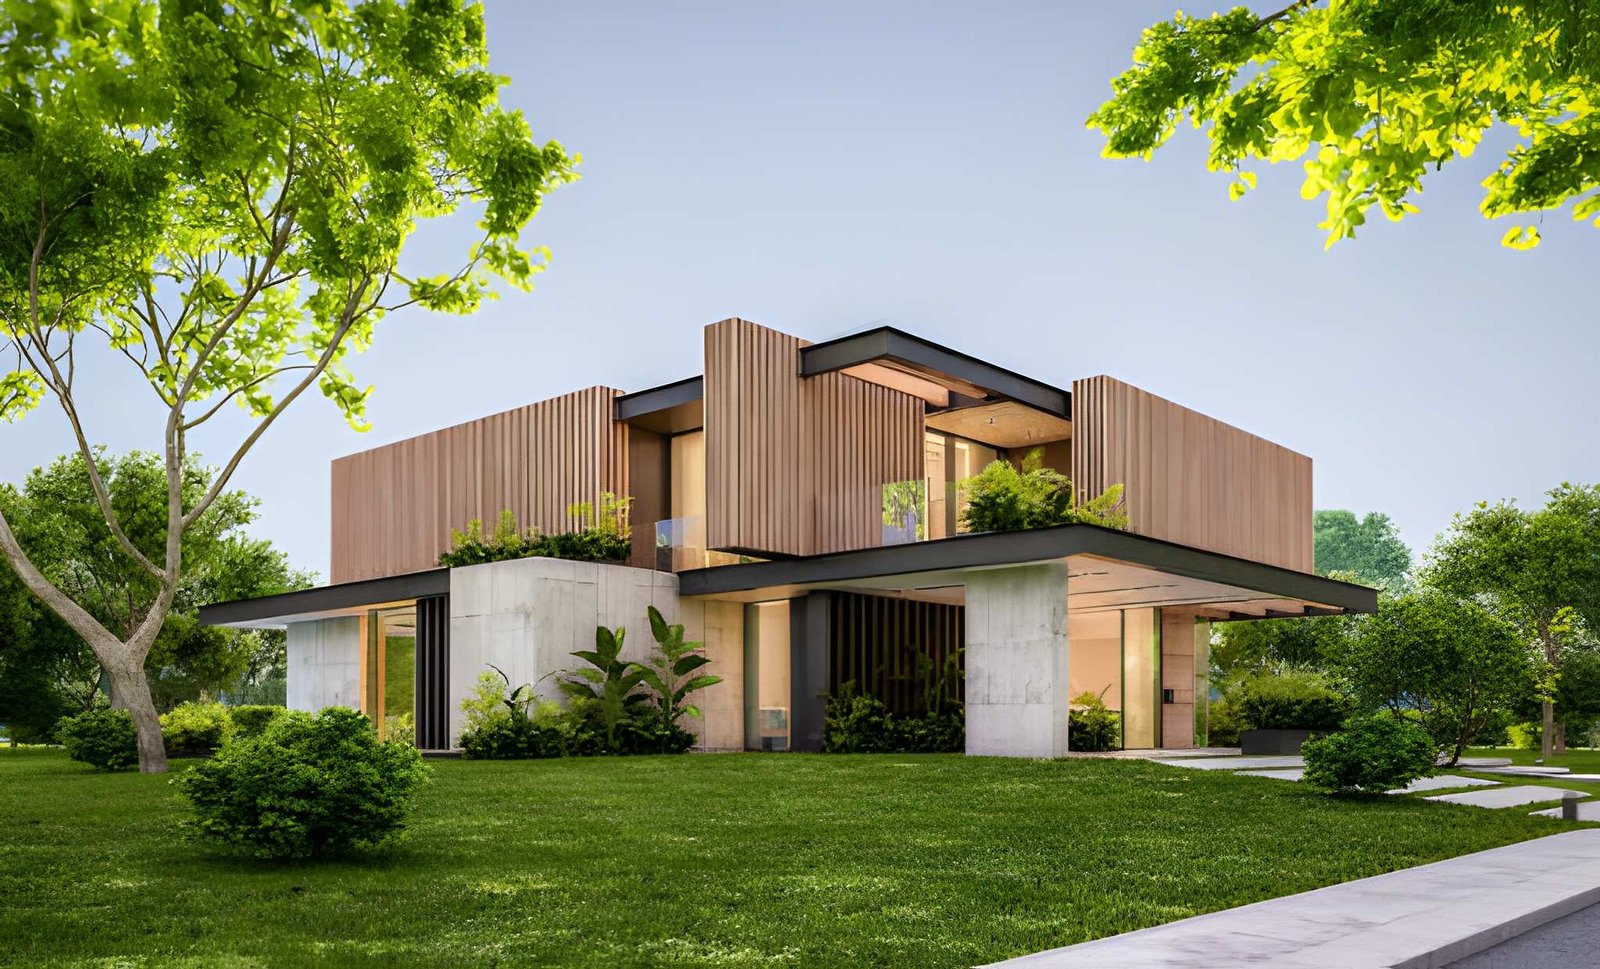
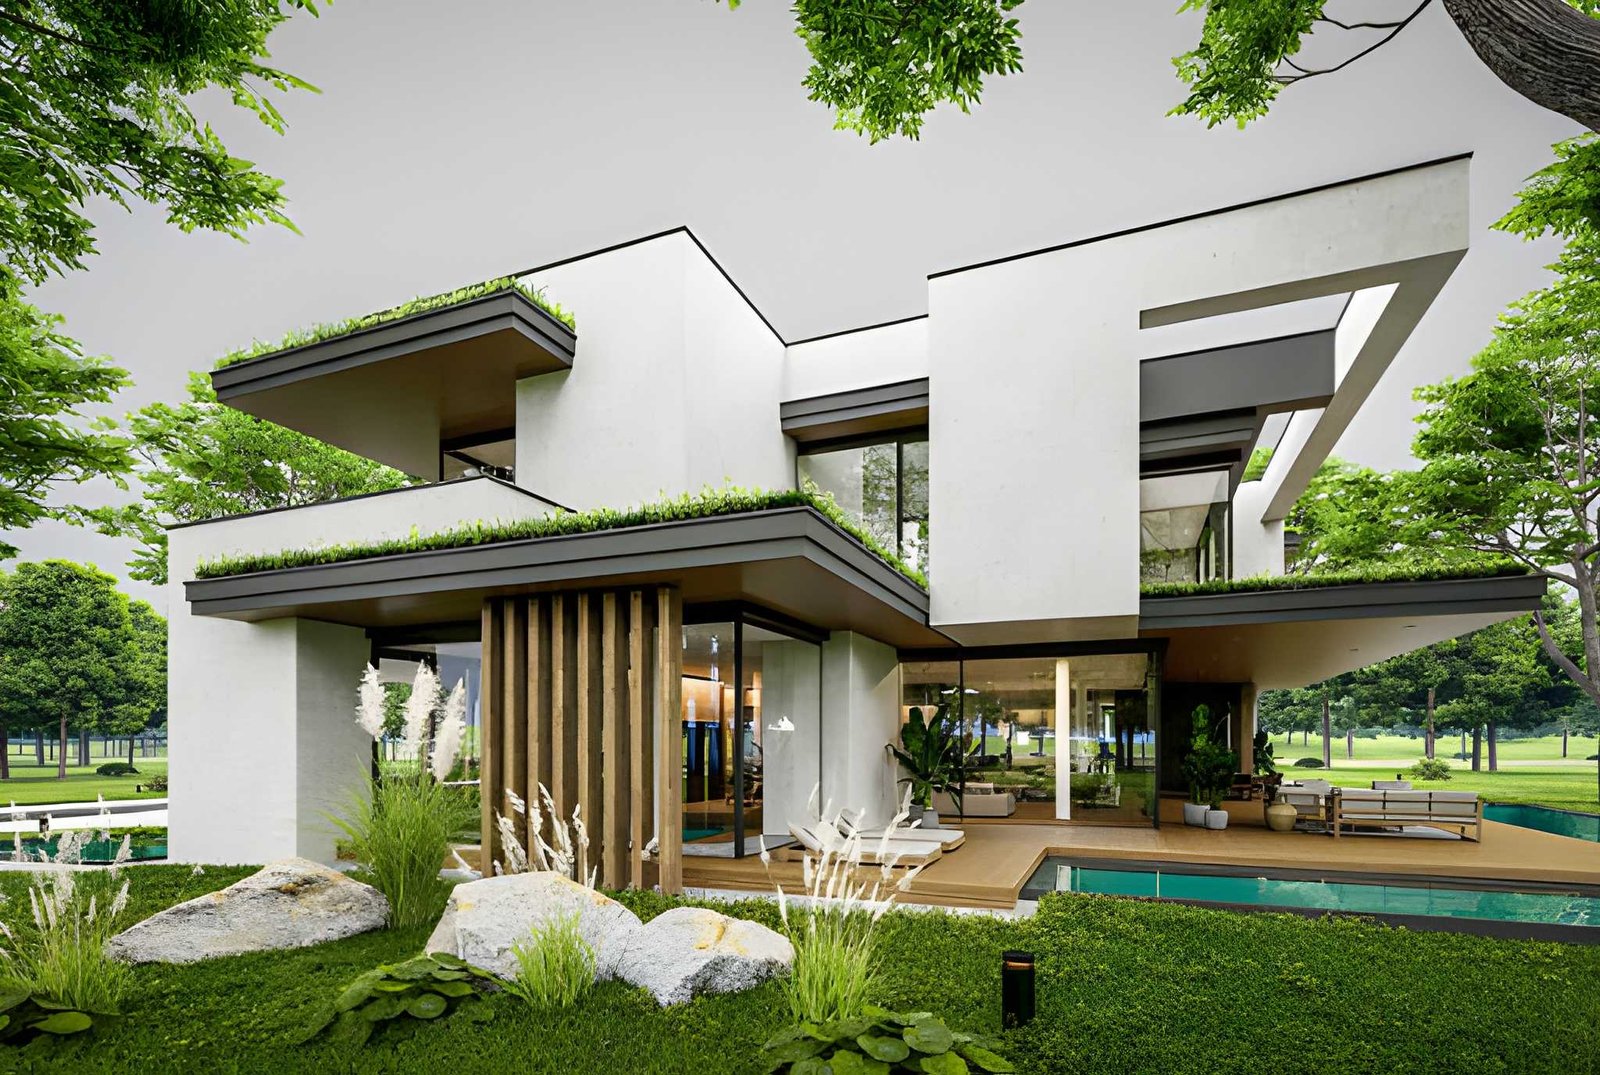
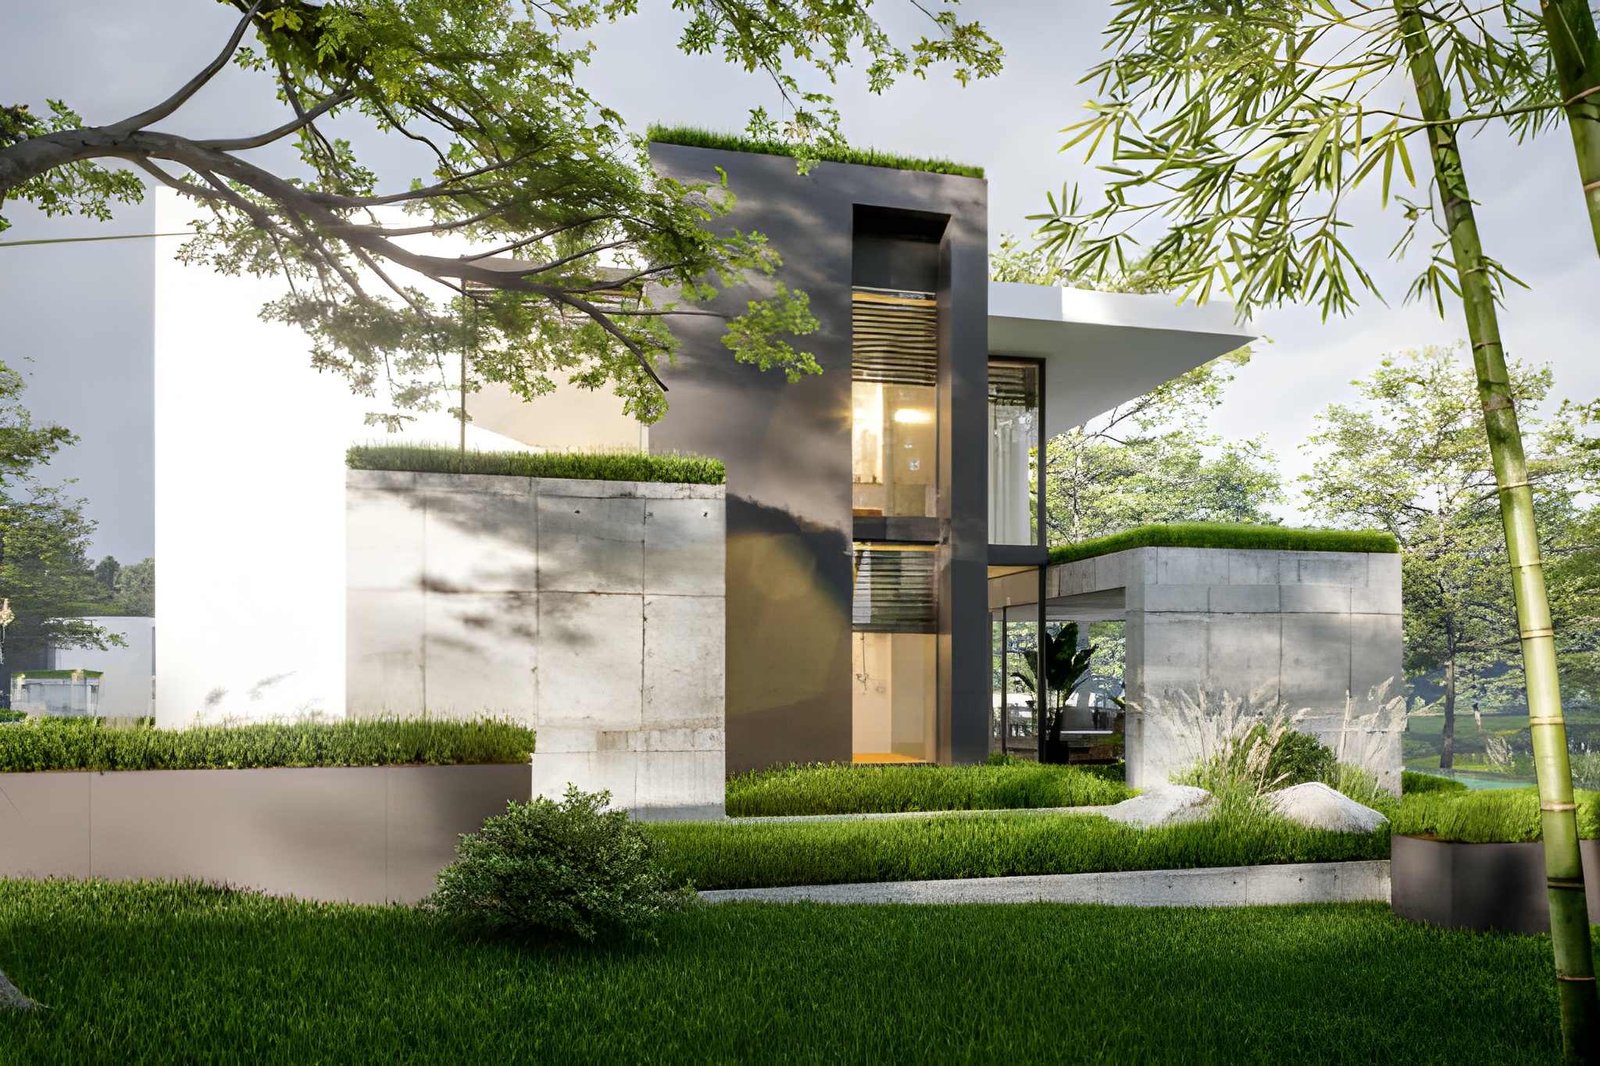
Exterior rendering: the fastest way to lock down façade approvals

Most homeowners care deeply about what the house looks like from the street. The problem is that elevation drawings are technical. They don’t show material texture, real lighting, landscaping, or how the home sits in context.
Exterior rendering solves this by showing:
Roofline and massing in realistic perspective
Material combinations (brick, render, cladding, stone, timber)
Window proportions and trim details
Garage and driveway integration
Landscaping cues that influence the first impression
A single photorealistic exterior view can prevent weeks of back-and-forth on façade style. It makes the decision immediate.
This is especially valuable for renovation projects where the client worries about how the new extension will blend with the existing house. Exterior renderings make those transitions clear before construction begins.
Interior rendering: where approvals often break down
Exterior approvals are important, but interiors create the most conflict because interiors are lived in.
Clients often change their minds about:
Kitchen layout and island size
Living room proportions and seating fit
Bathroom tile choices
Lighting placement and ceiling details
Storage and cabinetry design
Interior renderings help because they show:
Room scale with furniture in place
Views from natural eye level (how a person experiences the space)
Daylight and shadow direction from windows
Material choices in context, not as isolated samples
If your goal is fewer change orders, interior rendering is where you win.
And you don’t need to render every room. You typically need the rooms where decisions are most expensive: kitchen, living, master bedroom, bathrooms, key corridors, and any feature areas like stair voids.
Photorealistic renderings: why realism matters for approvals
A common question is: “Do we need photorealistic quality, or can we use simple 3D?”
For approvals, photorealistic renderings matter because:
Clients judge quality through realism
Realistic lighting makes a space feel right (or wrong) quickly
Materials look believable, which prevents “sample shock” later
The client can emotionally commit to the design
Simple 3D models are useful early, but for final approvals—especially for finishes—photorealistic renderings reduce risk.
That doesn’t mean every image needs to be hyper-detailed like a luxury brochure. It means the lighting, scale, and materials are realistic enough that the client trusts what they’re seeing.
Design iterations: fix problems on screen, not on site
Every project needs design iterations. The question is where those iterations happen.
Late iterations on site are expensive. Early iterations in a 3D model are cheap.
3D rendering supports a smarter workflow:
Draft renderings establish layout and proportions
Client feedback happens while changes are still easy
A revised set of renderings confirms the final version
Construction proceeds with visual clarity and signed approval
This is why builders who adopt a rendering-first approach experience fewer delays and fewer disputes. The design is “tested” in visuals before it becomes physical.
How 3D supports the approval process with stakeholders
Client approvals are rarely just “client.” Often there are multiple stakeholders:
Spouse or partner
Parents contributing financially
Project manager or architect
Engineer or consultant
Lender, investor, or developer partner
Each stakeholder focuses on different issues. A visual helps because it gives everyone a shared reference. Instead of debating interpretations of drawings, people respond to the same rendering.
In practice, this reduces:
Conflicting instructions
“He said / she said” misunderstandings
Endless messaging threads with vague feedback
Rework caused by assumptions
A rendering becomes a visual record of what was agreed.
Adding a virtual walkthrough: when a virtual experience helps approvals
Some projects are hard to understand even with images. Open-plan layouts, split levels, double-height spaces, and complex renovations often need more than static views.
That’s where a virtual walkthrough experience can help.
A virtual walk-through does not need to be full virtual reality. It can be:
A sequence of interior renderings arranged like a guided tour
A simple video walkthrough from entry to living to bedrooms
A few key perspectives that simulate movement through the house
This helps clients approve:
Circulation and flow
Visual connections between spaces
How the house feels while moving through it
Stair placement and voids
When clients can “walk” the design, they approve faster because they understand it better.
What to provide Build3Drender to get accurate renderings
To create approval-ready renderings, we need enough information to model accurately. The good news is you don’t need perfection to start.
A typical package includes:
Floor plan and elevations (PDF or CAD)
Any key sections for ceiling heights and voids
Material notes or a basic palette
Reference images for style direction
Any specific client concerns: “kitchen feels small,” “façade needs to look modern,” etc.
From these inputs, we build a clean 3D model and propose camera angles for review before producing final renderings.
How Build3Drender structures a client-approval rendering workflow
Our goal is simple: make approvals smooth for you and easy for the client.
A typical workflow looks like this:
Stage 1: Base model and camera confirmation
We create the 3D model from the drawings and share simple draft views. This is where layout and proportions are confirmed.
Stage 2: Materials, lighting, and draft renderings
We apply materials, set interior lighting, and create draft renderings for feedback. This stage is about design approval decisions: finishes, mood, and key details.
Stage 3: Final renderings for sign-off
Once feedback is incorporated, we produce final, high-resolution renderings that you can use for client sign-off, sales material, or documentation support.
This staged approach keeps design iterations efficient and prevents surprise changes late in the timeline.
Common approval mistakes 3D rendering prevents
If you’ve been building or renovating long enough, these will sound familiar:
Client thought the room would be bigger
Client didn’t realise the window would sit higher
Client didn’t understand the roofline from elevations
Tile sample looked different once installed
Kitchen island felt too tight around circulation
Lighting placement felt harsh or insufficient
Renderings bring these issues forward early, when changes are still easy and inexpensive.
Practical examples: where 3D approvals save money
Example 1: Kitchen layout dispute avoided
A client approves a kitchen based on a floor plan, but later argues that the island is too large. An interior rendering would have shown circulation clearance immediately and avoided redesign after joinery ordering.
Example 2: Façade material confusion resolved
A homeowner chooses a “light brick” from samples but later dislikes how it looks next to window frames. An exterior rendering with accurate material colours would have allowed them to approve the right combination early.
Example 3: Renovation extension scale clarified
A rear extension looks fine on drawings, but the client fears it will dominate the backyard. A rendered view from the garden makes scale obvious, allowing confident approval or early adjustment.
These are not rare cases. They happen constantly in residential work. The difference is whether you catch them before or after you break ground.
Final thoughts: approvals are a construction risk, not just a design step
Approvals are not paperwork. They are risk management.
When clients approve designs with uncertainty, they bring that uncertainty into the construction phase—and that uncertainty costs time and money. 3D house rendering for client approvals solves the core problem: it makes the design understandable, believable, and emotionally clear before any irreversible work begins.
For home builders, renovation firms, and contractors, that means:
Faster approvals
Better client trust
Fewer site changes
Cleaner communication with stakeholders
More predictable projects and healthier margins
If you want your next project to run smoother, start by making the design visible. Build3Drender helps you turn drawings into approval-ready 3D visuals—so your client signs off with confidence before you ever break ground.